AWS:SSM Connect to private ec2 instances
#Cloud
#AWS
#IAM
Introduction
AWS SSM(Systems Manager) is the operations hub for your Amazon Web Services applications and resources and a secure end to end management solution for hybrid cloud environments that enables safe and secure operations at scale. They can be used to manage servers on any infrastructure. It allows you to track and resolve operational issues across your infrastructure, automate tasks and secure access to instances without needing to open ports or use public IPs.
Why use AWS SSM?
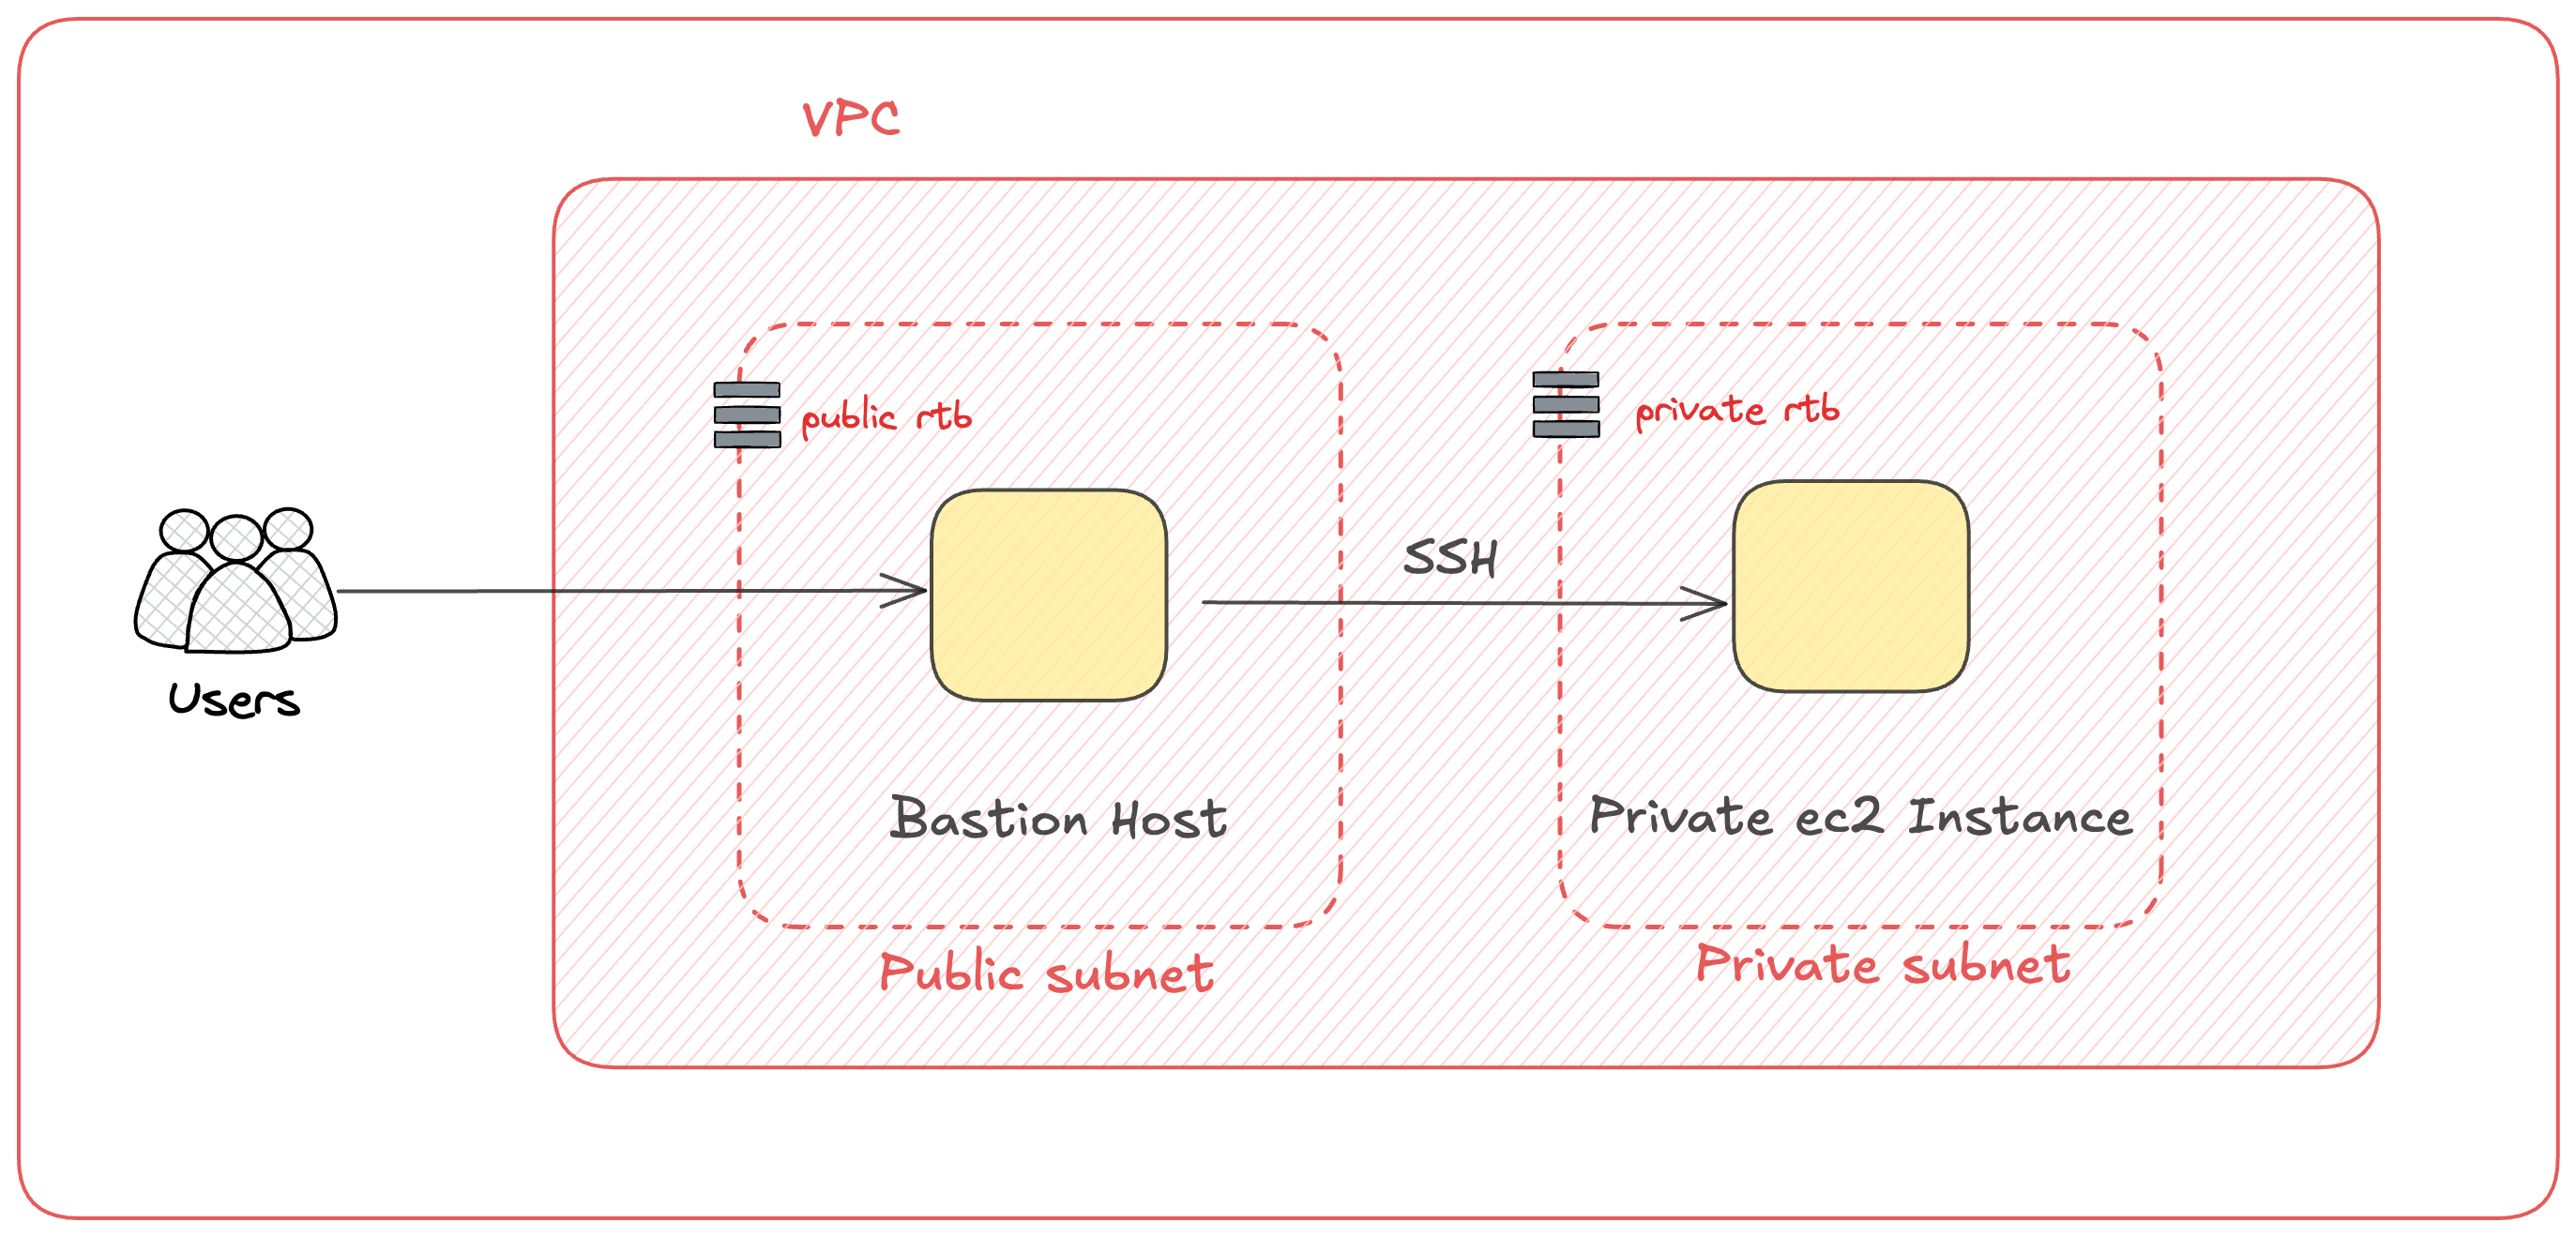
Why use AWS SSM for private instances? Traditional connection to private ec2 instance can be done through:
- Bastion hosts
- SSH Keys
- Public IPs
With AWS session manager, you can:
- Eliminate SSH
- Avoid managing bastion hosts
- Keep your network fully private and secure
- Audit sesion logs centrally
Traditionally, connection to a private EC2 instance would look something like this:
Prerequisites
Before following along, make sure to have understand the following prerequisites:
- Basic understanding of AWS services, especially EC2 and IAM.
- Familiarity with AWS CLI and how to configure it.
- Understanding of VPC, subnets, and NAT gateways in AWS.
Hands-on
Step 1. Create a IAM role to give ssm access to your ec2 instance.
Go to the IAM console and create a new role with the permission policy AmazonSSMManagedInstanceCore.
This policy allows the instance to communicate with the SSM service. We will later attach this role to our ec2 instance.
Step 2. Create a VPC with private subnet and NAT gateway.
Create a VPC with a private subnet and a NAT gateway. The NAT gateway will allow the instance to access the internet for SSM operations. Make sure to configure the route table to route traffic from the private subnet through the NAT gateway.

Step 2.1 Configuring NAT Gateway.
To configure the NAT gateway, follow these steps:
- Go to the VPC console and select
NAT Gatewaysfrom the left sidebar. - Create a new NAT gateway in the public subnet of your VPC, and assign an Elastic IP to it.
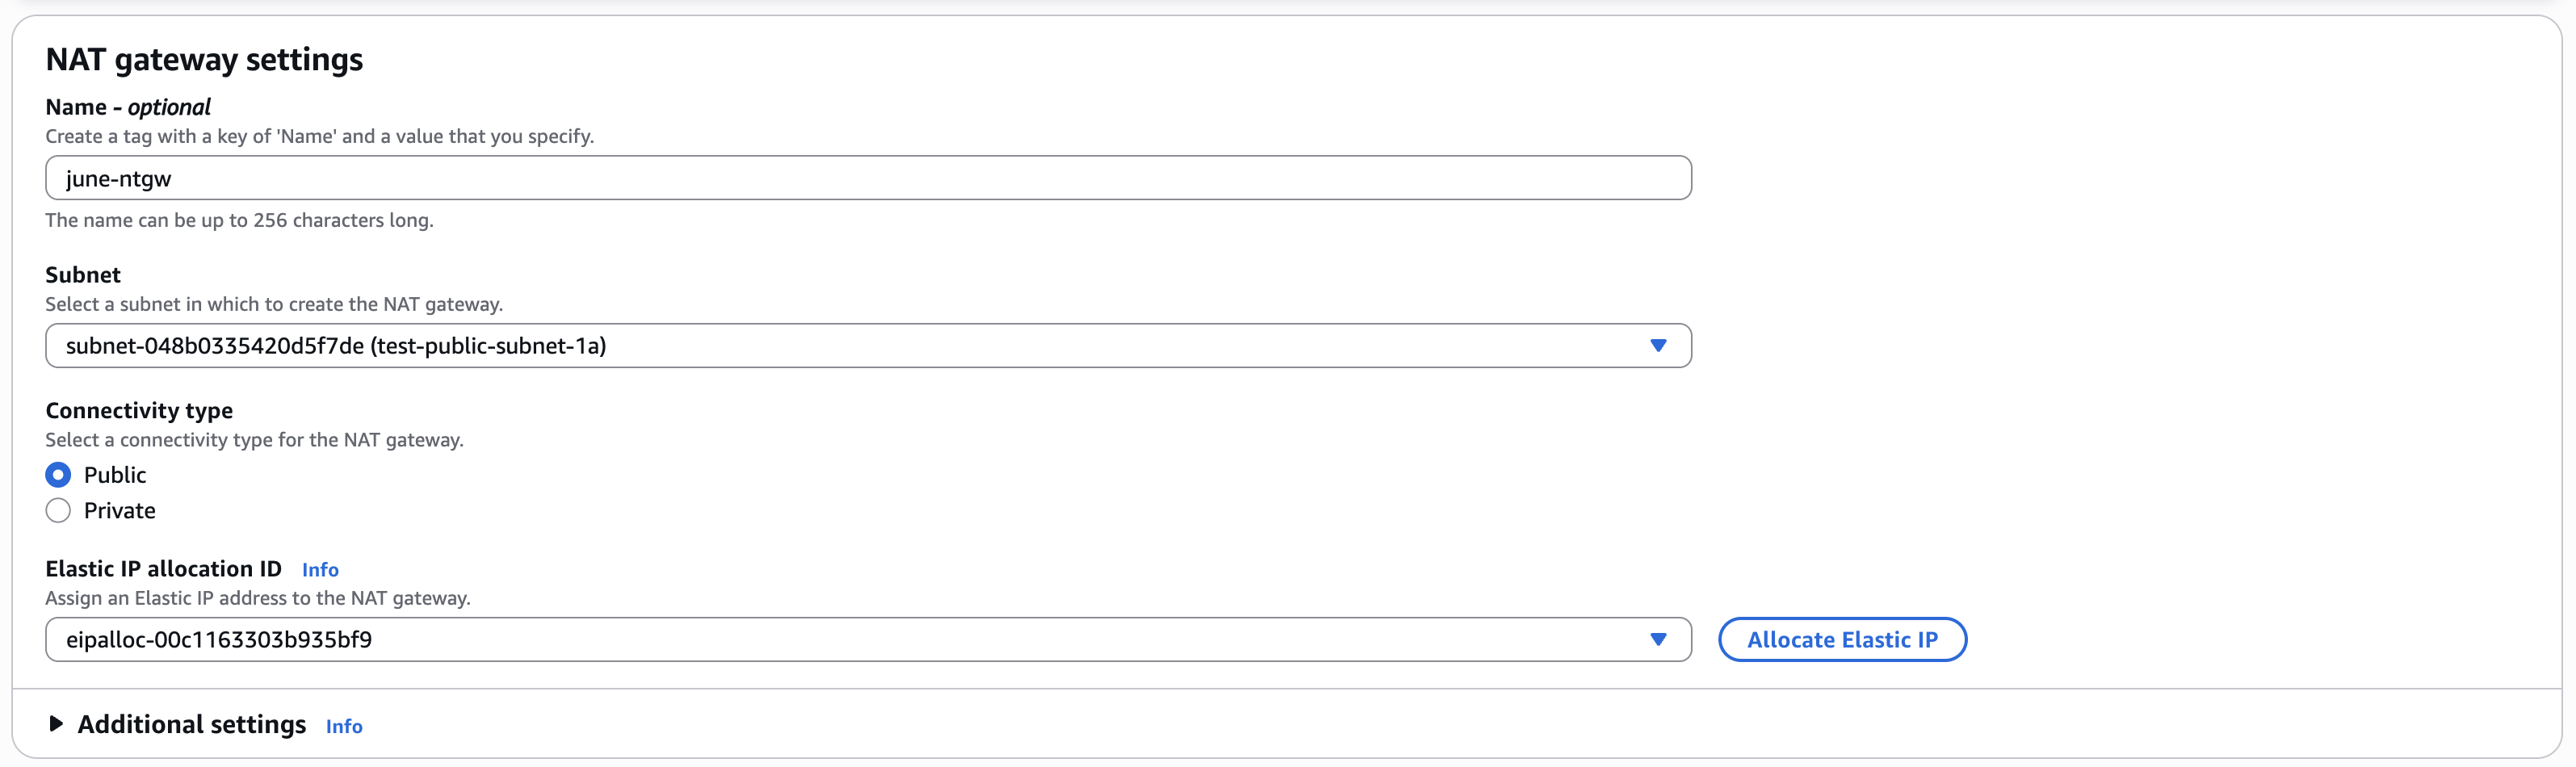
- Update the route table of the private subnet to use the NAT gateway for internet-bound traffic.
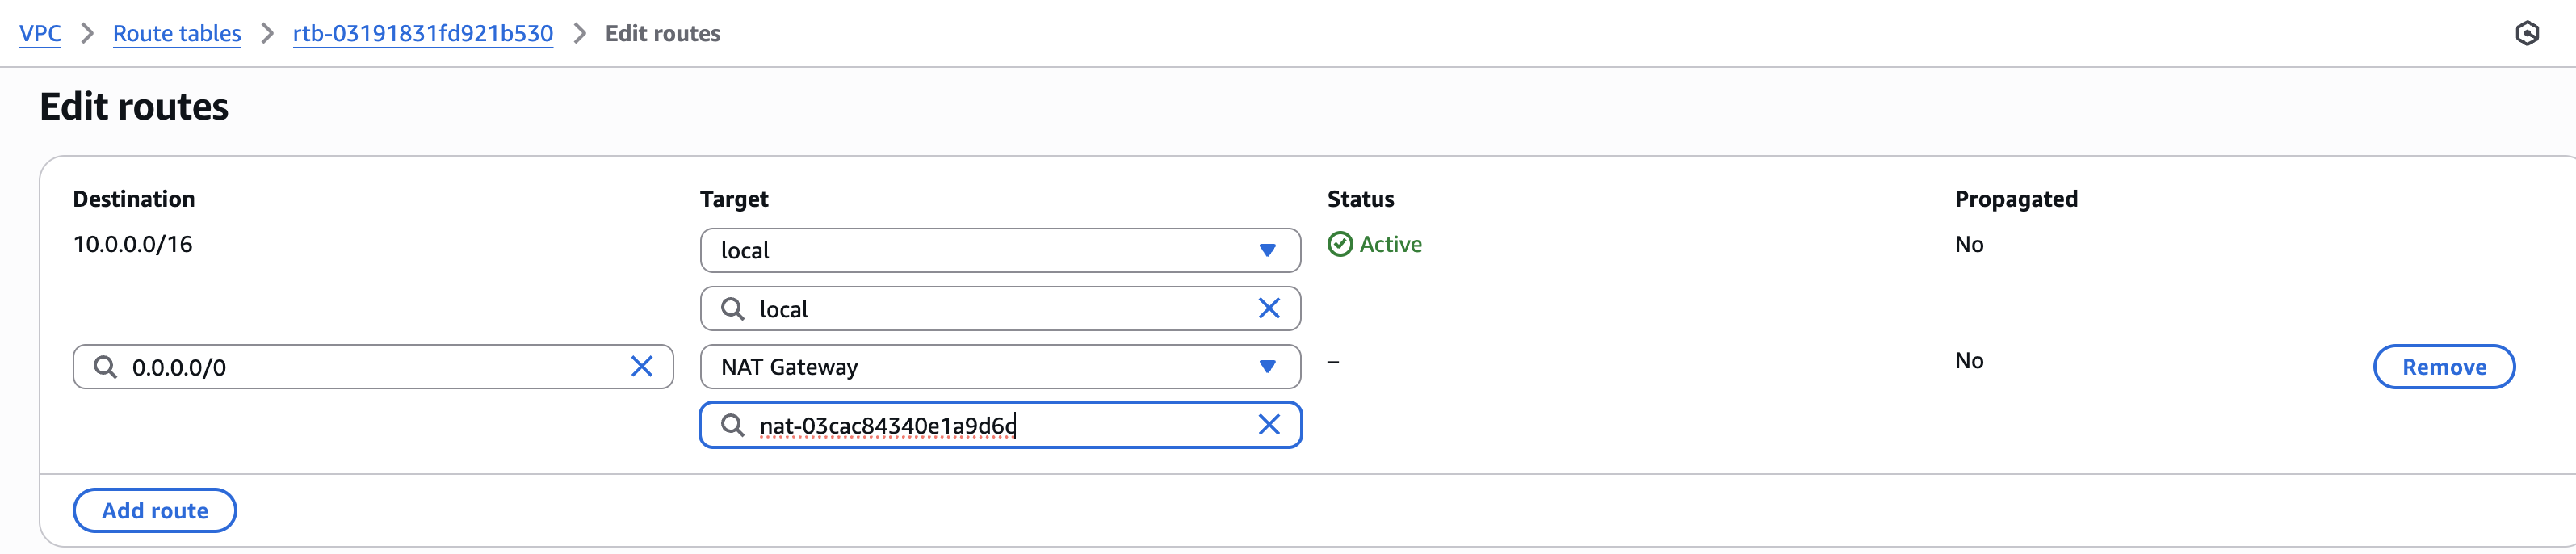 This will allow instances in the private subnet to access the internet for downloading package and system updates from the internet and SSM operations.
Note: If you already have created an EC2 instance and later setting a NAT gateway, be sure to restart the instance.
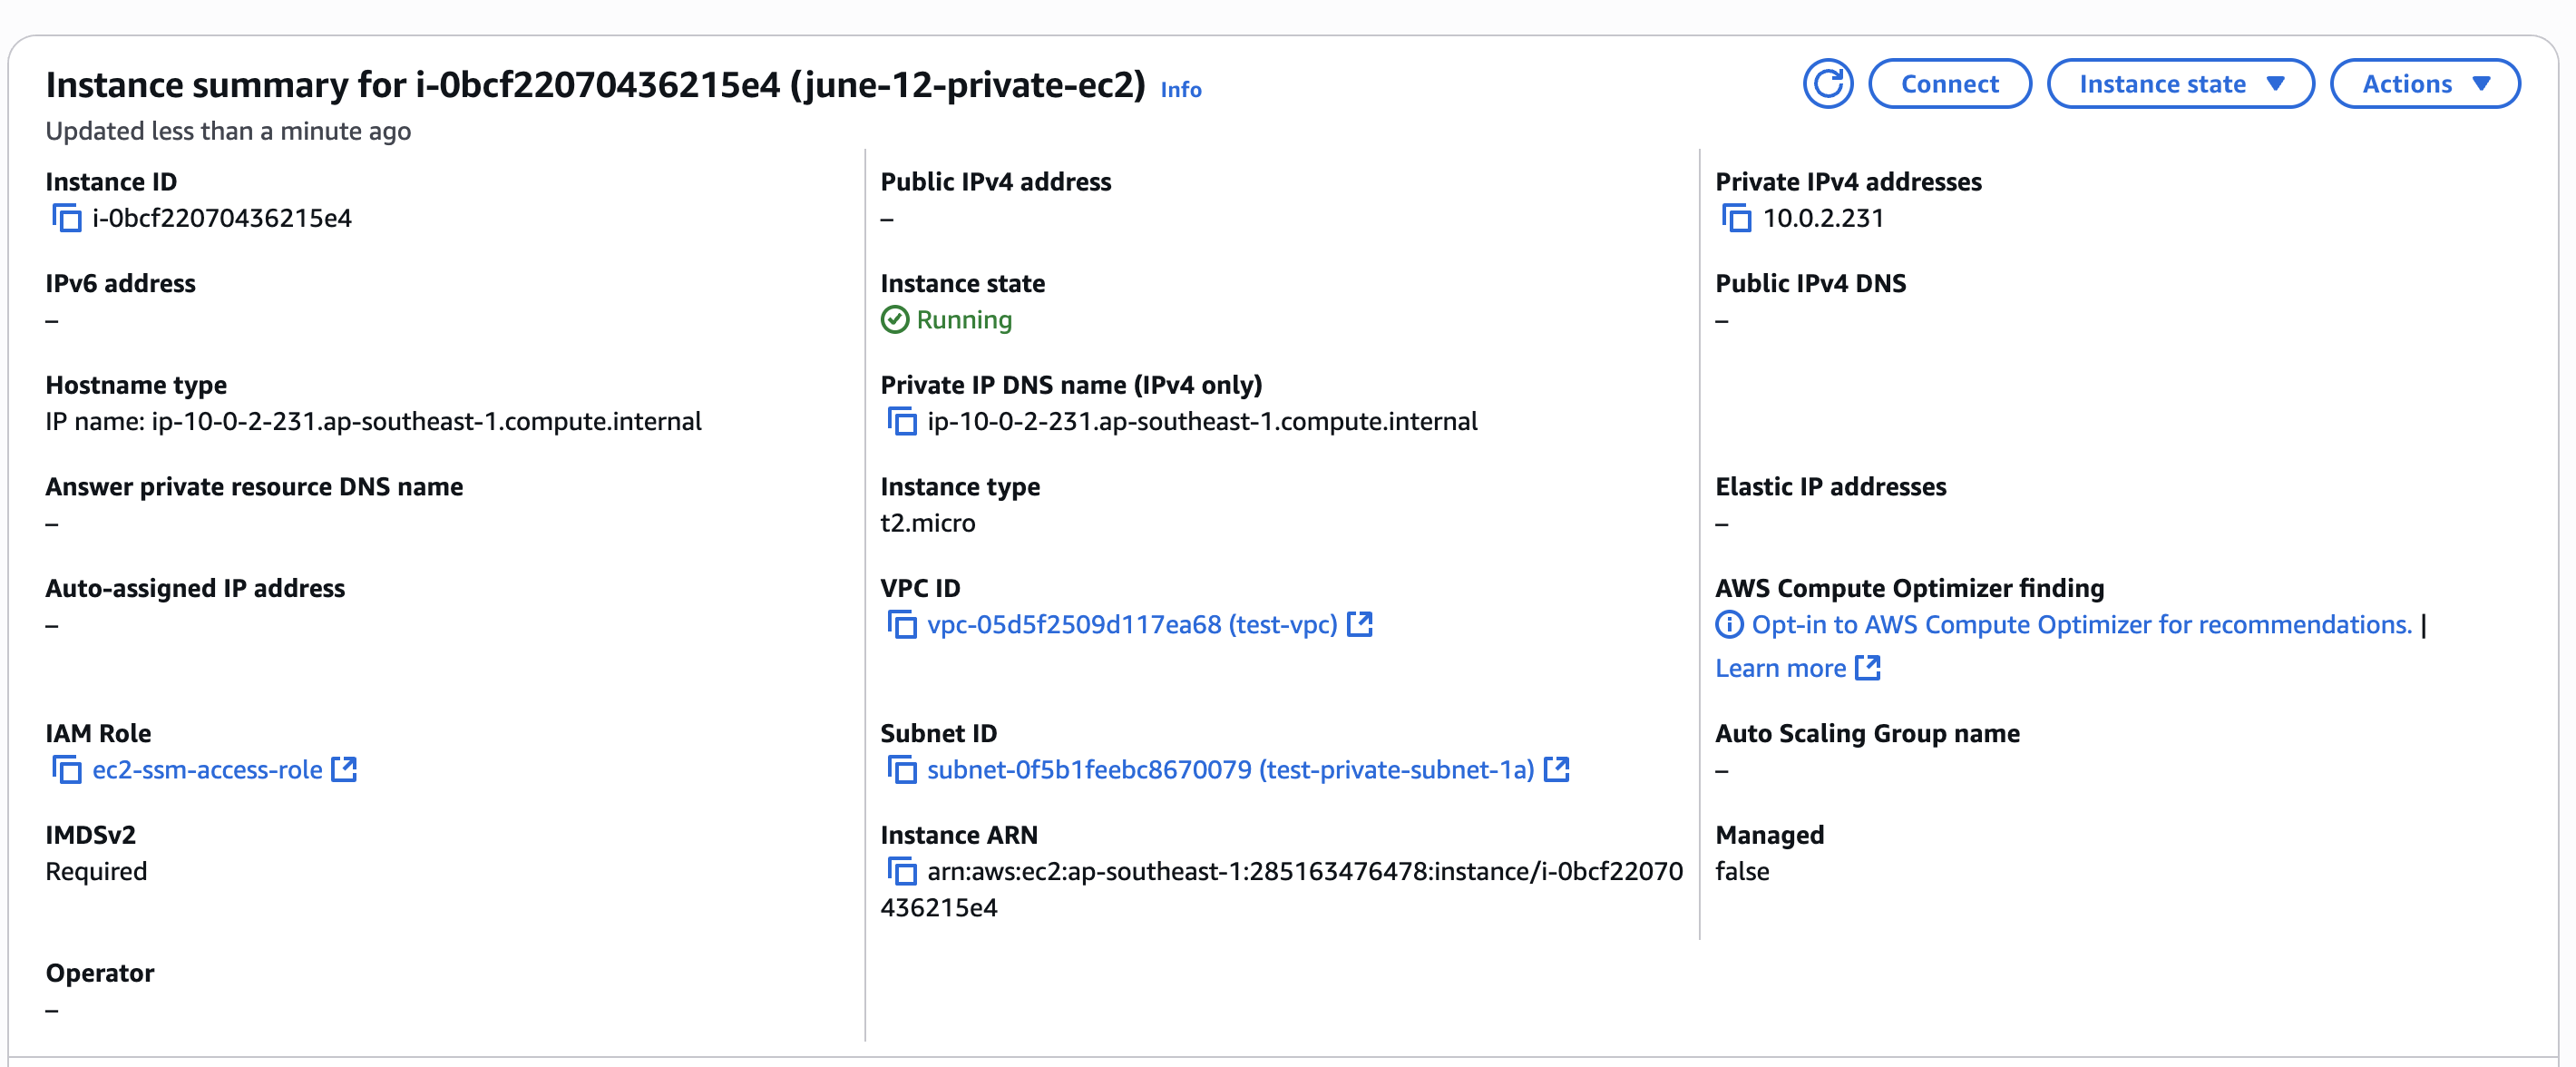
Step 3. Launch an EC2 instance in the private subnet.
Launch an EC2 instance in the private subnet and attach the IAM role created in Step 1. Make sure to select the correct VPC and subnet during the instance creation process. Multiple AMI will have SSM agent pre-installed, such as Amazon Linux 2 or Ubuntu. In rare cases, you may need to install the SSM agent manually.
Step 4. Managing IAM permissions for ssm.
Ensure that the user who will be connecting to the EC2 instance has the necessary IAM permissions to manage EC2 machines. To allow the user to connect to EC2 instance using SSM, create a custom policy with the following permission and attach it to the user:
{
  "Version": "2012-10-17",
  "Statement": [
    {
      "Sid": "SsmEc2CliAccess",
      "Effect": "Allow",
      "Action": ["ssm:StartSession", "ssm:SendCommand"],
      "Resource": [
        "arn:aws:ec2:region:account-id:instance/*",
        "arn:aws:ssm:region:account-id:document/SSM-SessionManagerRunShell"
      ]
    },
    {
      "Effect": "Allow",
      "Action": ["ssmmessages:OpenDataChannel"],
      "Resource": ["arn:aws:ssm:*:*:session/${aws:userid}-*"]
    },
    {
      "Effect": "Allow",
      "Action": [
        "ssm:DescribeSessions",
        "ssm:GetConnectionStatus",
        "ssm:DescribeInstanceProperties",
        "ec2:DescribeInstances"
      ],
      "Resource": "*"
    },
    {
      "Effect": "Allow",
      "Action": ["ssm:TerminateSession", "ssm:ResumeSession"],
      "Resource": ["arn:aws:ssm:*:*:session/${aws:userid}-*"]
    }
  ]
}
Replace the arn:aws:ec2:region:account:instance/* with your region and account ID.
This policy allows the user to start a session, send commands, and manage sessions on the EC2 instance.
Step 5. Setup aws cli and configure it with your credentials.
Login with the user who has the necessary permissions to connect to the EC2 instance using SSM.
Create a access key for the user in the IAM console.

Make sure you have the AWS CLI installed on your local machine.
To install aws cli you can refer to this link.
Also make sure you have session-manager-plugin installed. After having the AWS CLI installed, configure it with your credentials:
aws configure --profile <your-profile-name>
# I recommend using a profile to avoid conflicts with other credentials if you omit the --profile flag, it will be saved as the default profile
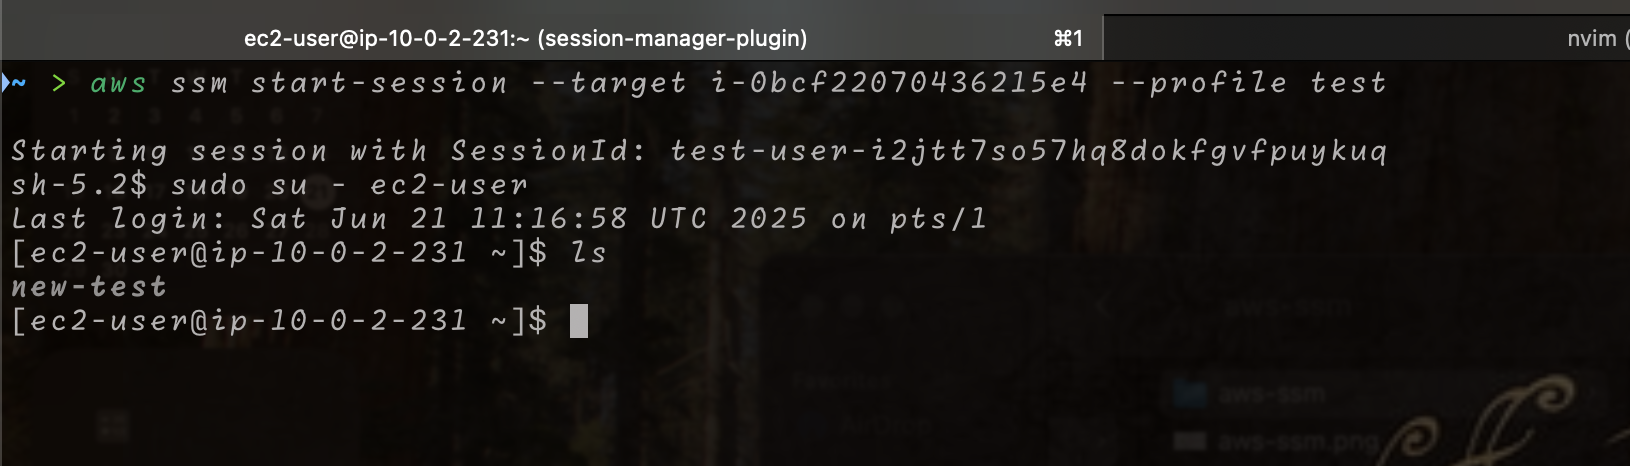
Step 6. Connect to the EC2 instance using SSM.
Now you can connect to the EC2 instance using the AWS CLI. Make sure you have the AWS CLI installed and configured with the necessary permissions. Use the following command to start a session:
aws ssm start-session --target <instance-id>
Replace <instance-id> with the ID of your EC2 instance. This command will open a session directly to your private instance without needing SSH.
After connecting, be sure to change the user to ec2-user or ubuntu depending on the AMI you are using:
It should loogk something like this:
Conclusion
In this guide, we covered how to connect to a private EC2 instance using AWS SSM without the need for traditional SSH methods and bastion hosts. However be aware of charges that may incur when using SSM, such as data transfer costs and NAT gateway costs besides the obvious ec2 costs.
References
https://docs.aws.amazon.com/cli/latest/reference/ssm/ https://docs.aws.amazon.com/systems-manager/latest/userguide/getting-started-restrict-access-quickstart.html